Master the Text Tool in Vector Ink: Add, Edit, and Curve Text Along Any Path
Typography can make or break a design — and Vector Ink gives you total fr...
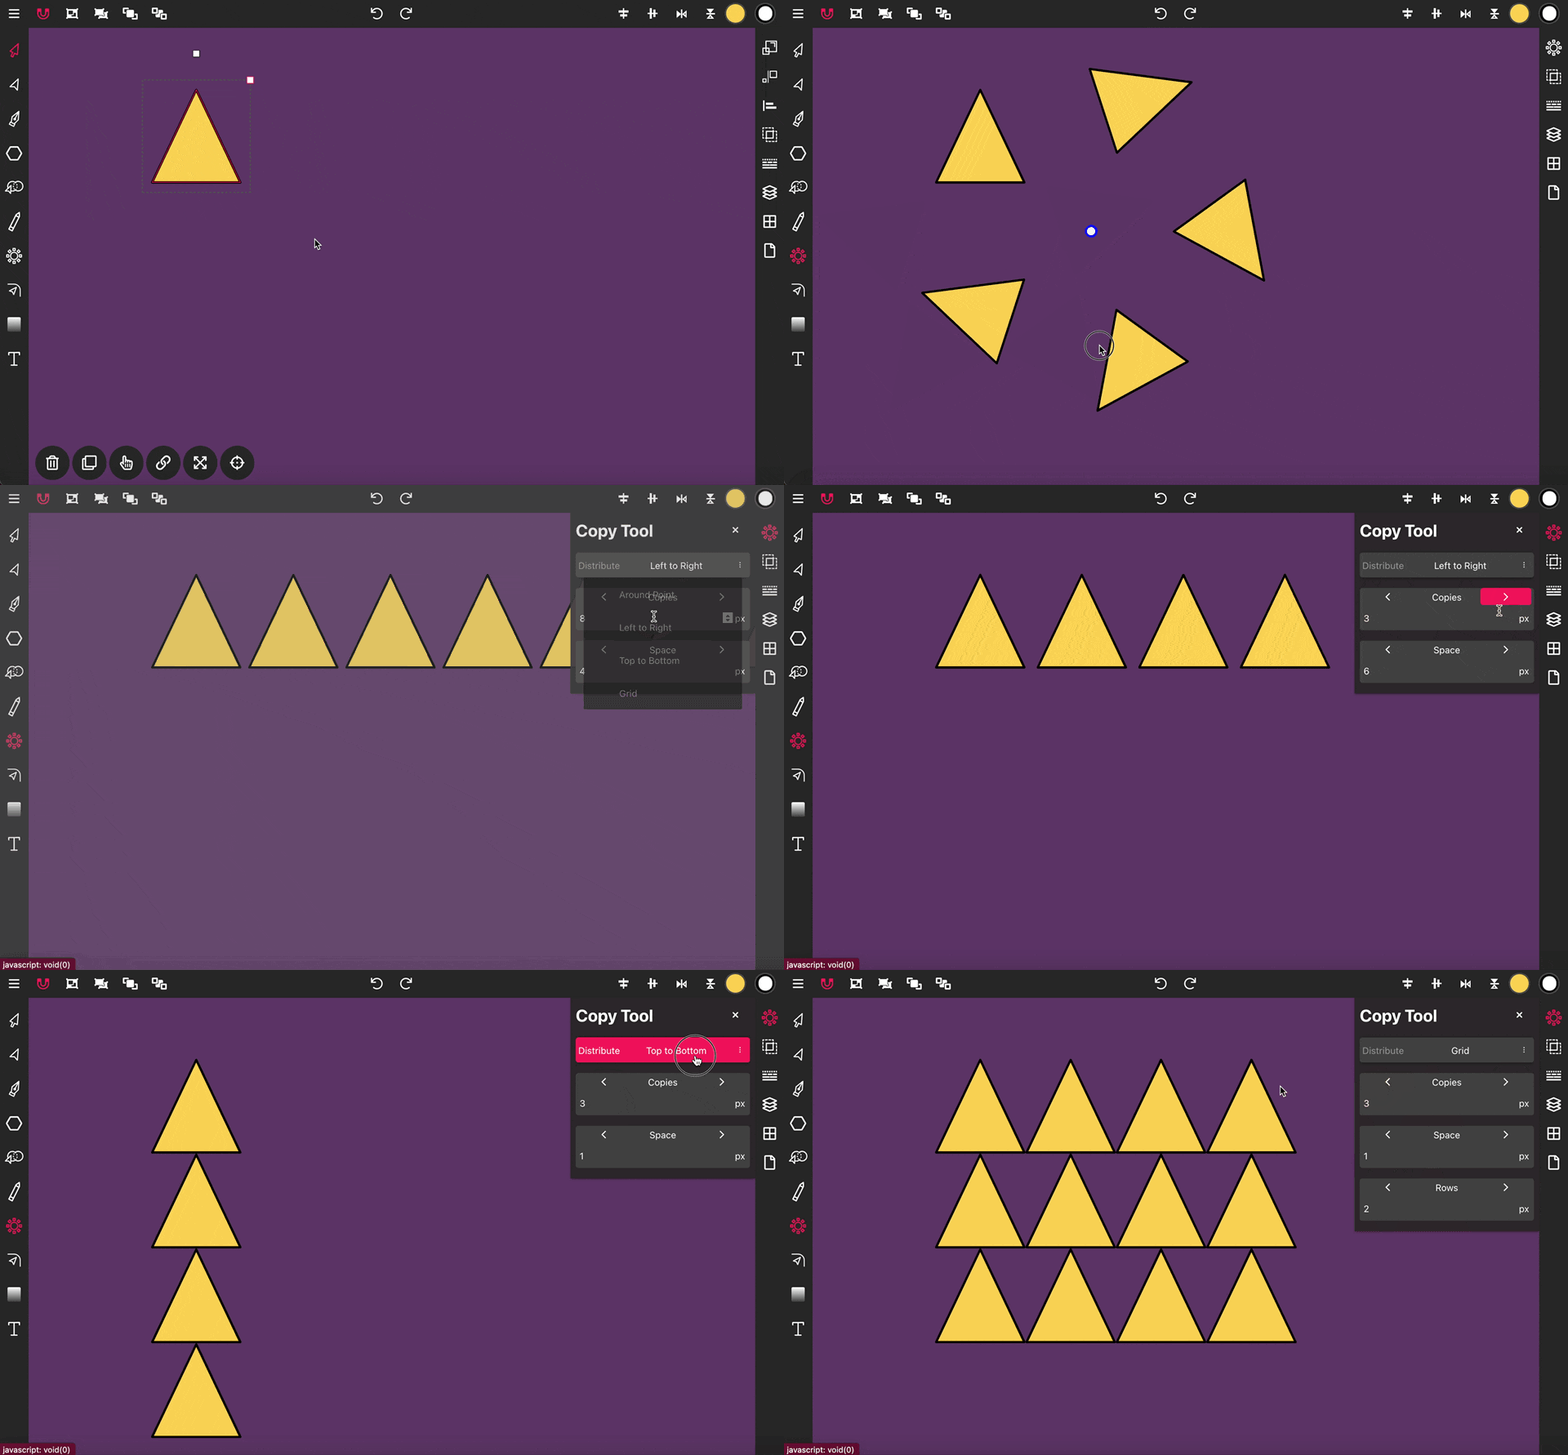
The Copy Tool is designed for creating multiple copies of an object around a point, or arranging them horizontally, vertically, or in a grid pattern. This tool is versatile for generating repetitive patterns and arranging objects efficiently on your canvas.
By default, activating the Copy Tool places a point handle on the canvas. This handle acts as the central point around which the objects will be distributed. You can move this reference point by dragging it across the canvas; upon release, the objects will automatically adjust around the new center point. To specify the number of copies, open the Copy Tools property panel and set your desired quantity.
Once you have arranged your copies as needed, switch back to the Selection Tool to finalize the placement on the canvas.

For linear distribution, access the Copy Tools property panel and select the Distribute property. Choose either Left to Right for horizontal alignment or Top to Bottom for vertical alignment. You can then set the number of copies and the spacing between each object.
To organize copies into a grid formation, open the Copy Tools property panel and set the Distribute property to Grid. Specify the number of copies, which will define the number of columns. Additionally, enter the desired number of rows and the spacing between objects to achieve a precise grid layout.
Typography can make or break a design — and Vector Ink gives you total fr...
Organization is key to efficient vector design. In this tutorial, we’ll e...
Repetition is a key element in creating balanced, structured, and efficient...
Drawing in Vector Ink is not only super easy but also incredibly intuitive....
The Selection Tool is a fundamental component of Vector Ink, essential for ...
With the Pen Tool, you can draw paths with sharp or smooth anchor points an...