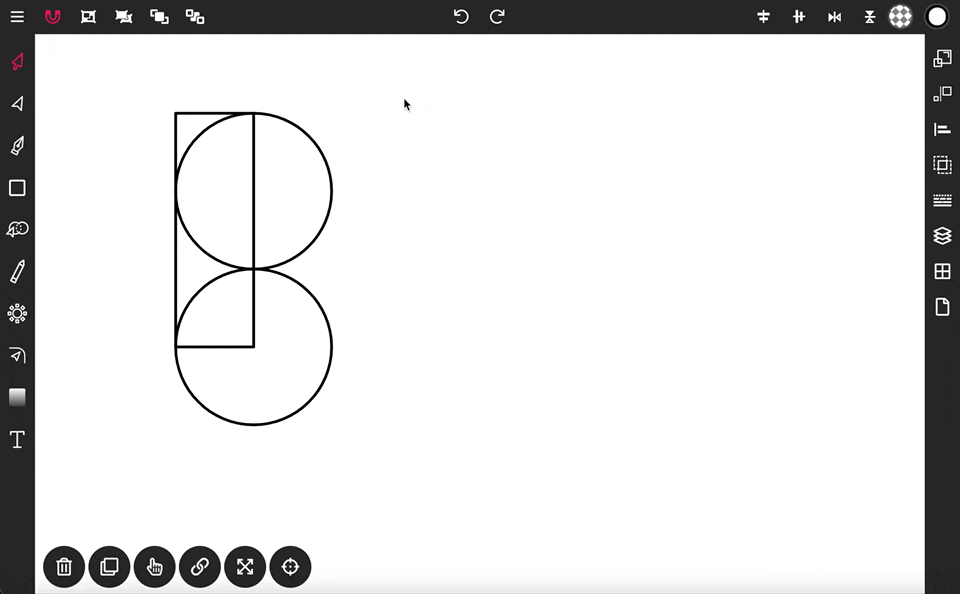
The Path Builder Tool is a powerful tool for creating custom shapes by combining two or more other shapes. To use it, select the shapes on the canvas you want to combine, then select the Path Builder Tool in the toolbar. Drag between the strokes you want included in your new shape. Strokes highlighted orange indicate an open path, while blue strokes indicate a closed path. Dragging over a closed path will break it and turn it back to orange. To repair broken paths, use the Pencil Tool in the Path Builder Tools toolbar to reapply the stroke. To prevent breaking closed paths, toggle off the Sculpt Tool.
Handling Mistakes
If you accidentally highlight the wrong stroke, activate the Eraser Tool and drag over the undesired stroke to remove it. Deactivate the Eraser Tool to continue shaping.
Finalizing Your Shape
Once you are satisfied with the shape, switch to another tool, like the Selection Tool, to finalize and place the new shape onto the canvas.
Using a Single Shape
The Path Builder Tool can also be activated with only one selected shape. This is useful when adjusting a single shape without affecting its intersecting shapes.
Manually Selecting Strokes
Instead of dragging between strokes, you can manually select strokes by toggling on the Pencil Tool and dragging over the strokes you want to include in your new shape.
Sculpt Tool
The Sculpt Tool, by default toggled on, allows you to sculpt paths by breaking them as needed to create the desired shape. If you do not want paths to break, toggle off the Sculpt Tool.
Subtract Tool
Use the Subtract Tool to cut holes in your shape. Toggle on the Subtract Tool to highlight and remove the inside parts of a shape.
Properties Panel
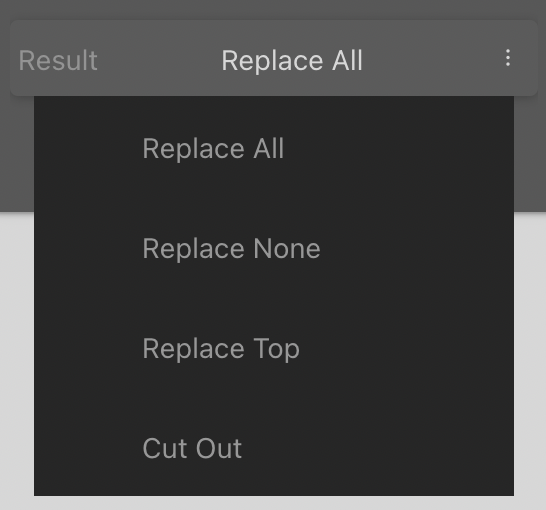
When the Path Builder Tool is active, the Path Builder Tools icon appears in the properties panel. Open this panel to adjust the Result property. "Replace All" is the default setting, which deletes all included shapes and replaces them with the new shape. "Replace None" keeps all original shapes intact but selects the new shape. "Replace Top" replaces only the topmost shape. "Cut Out" performs a boolean subtraction, using the new shape to cut out from the old shapes.
The Corner Tool is specifically designed for rounding the corners of paths. Once activated, handles will appear on the sharp corners of any selected path. To adjust the corners, select the handles individually. Dragging these handles downward will increase the rounding of the corners, while dragging upward will decrease it. Release the handles to apply the rounding changes to the corners.
The Circle Tool in Vector Ink allows you to draw perfect circle shapes directly onto your canvas, ideal for various design needs from basic geometric forms to complex compositions.
The Star Tool in Vector Ink enables you to easily draw star shapes onto the canvas, perfect for creating dynamic and decorative elements in your designs.
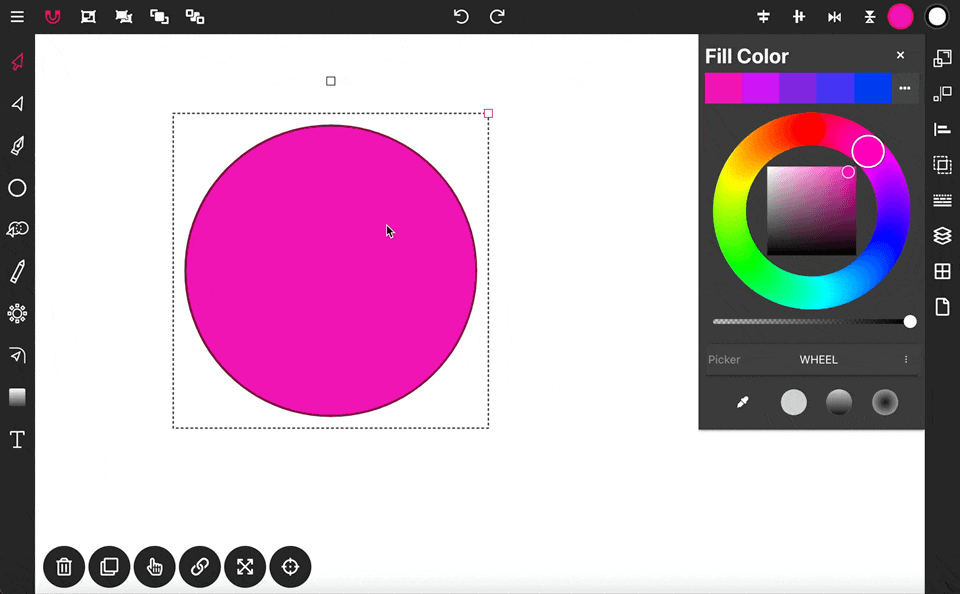
Vector Ink's Color Panels offer a variety of color picker options, gradient choices, and automatically generate a new color palette at the start of every new project, enhancing the color selection process for your designs.