
How to Mask Images in Vector Ink
Mask images into any shape easily and conveniently online. Image masking allows you to crop your image into a shape. With image masking you can create a collage of images framed within any shape. With the Vector Ink app online you can import your own photo or photos, add the desired shapes behind the photo, and crop the image into the shape with one click. There are no limits to what you can create and best of all, it’s free to download within the web app, no watermark or anything.
Step 1
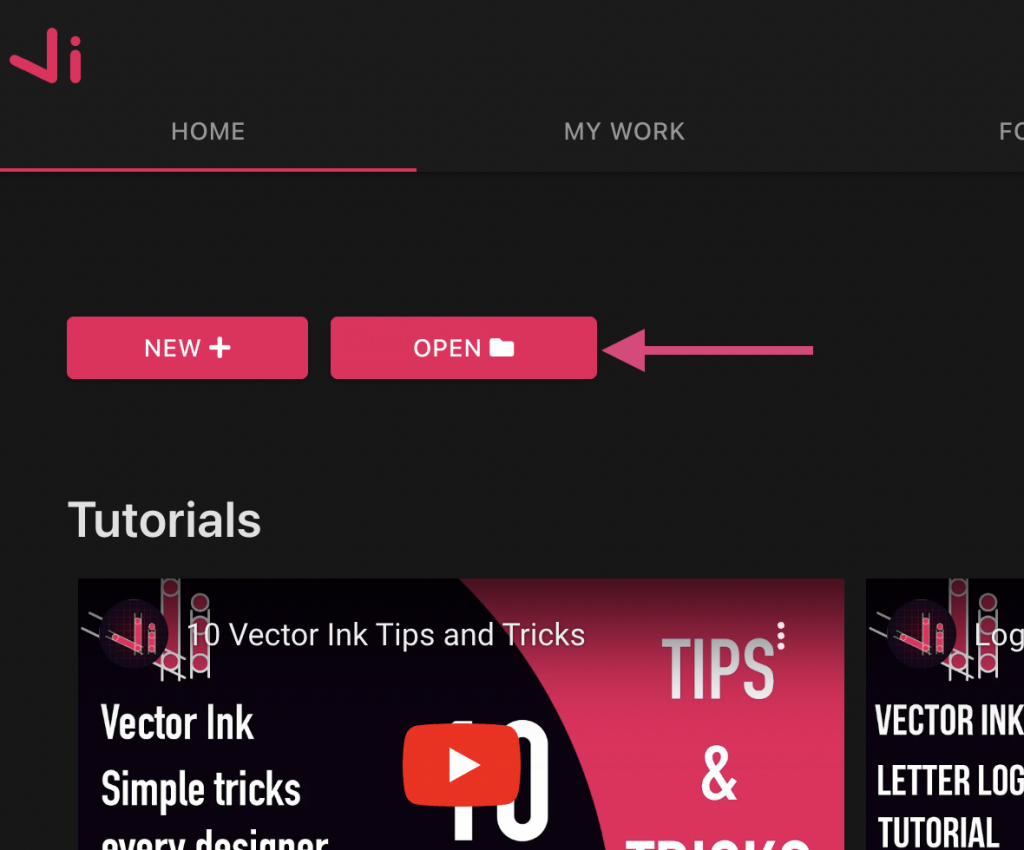
Head over to vectorink.io and click Launch App. Once in the app, click Open and select the image you wish to mask from the file explorer.

Step 2
After selecting the desired image, you will be taken into the canvas.
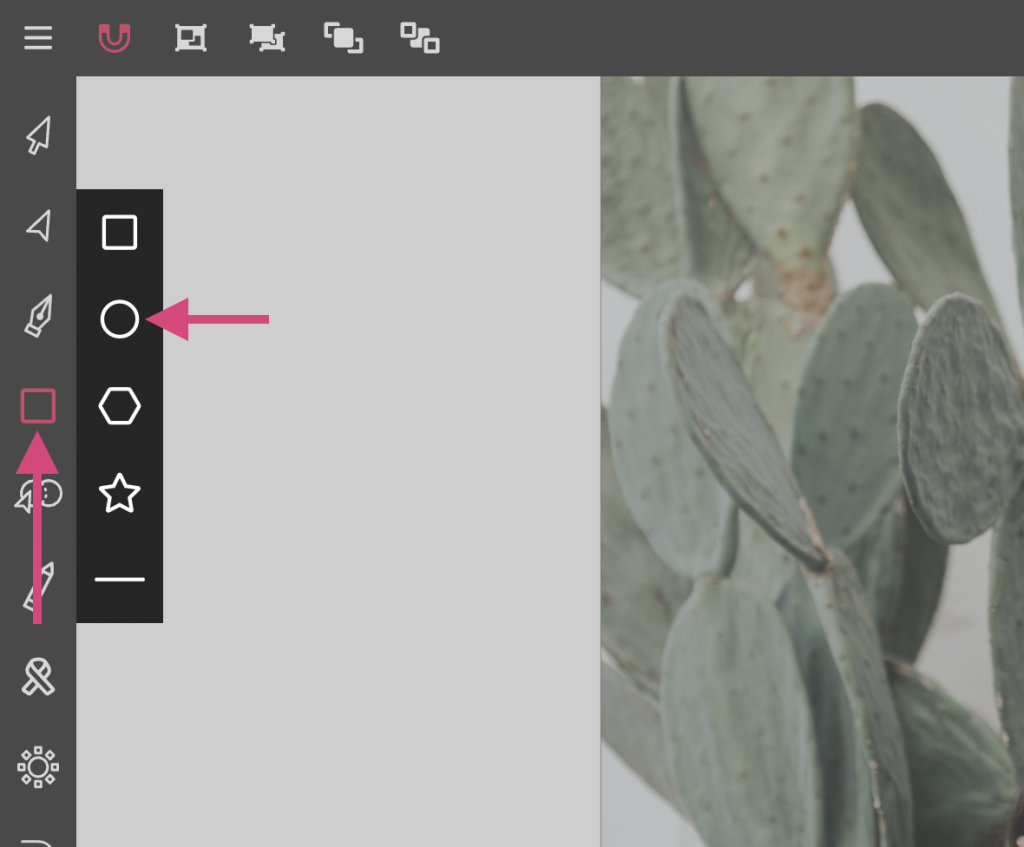
In the canvas tap on the Rectangle Tool in the toolbar, then tap on it again to bring up the shapes menu.
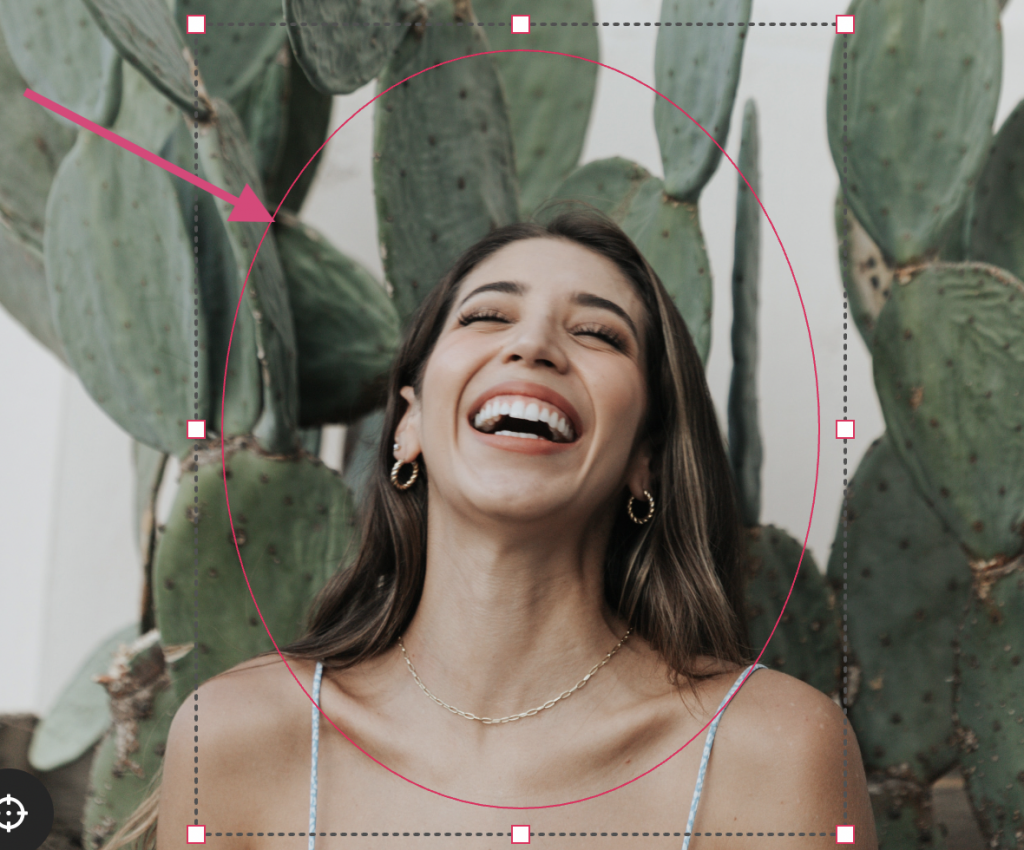
Click on the desired shape to mask with, for this tutorial we will be using the circle.
Then drag you mouse over the are of the image you which to crop out and activate the Selection Tool to make adjustments.
Step 3
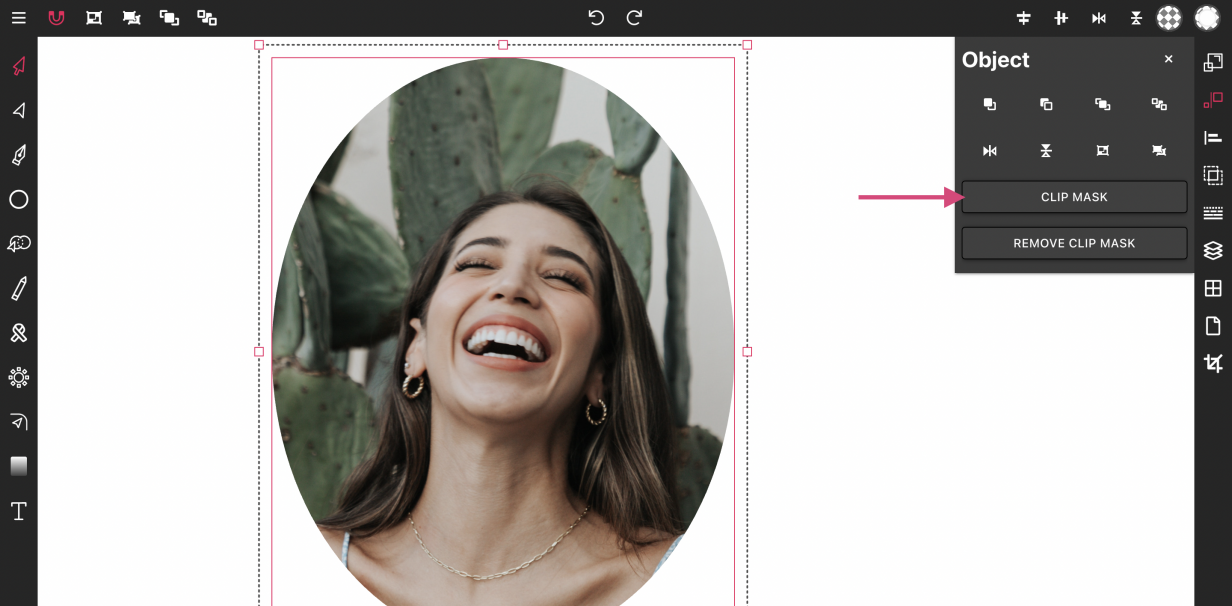
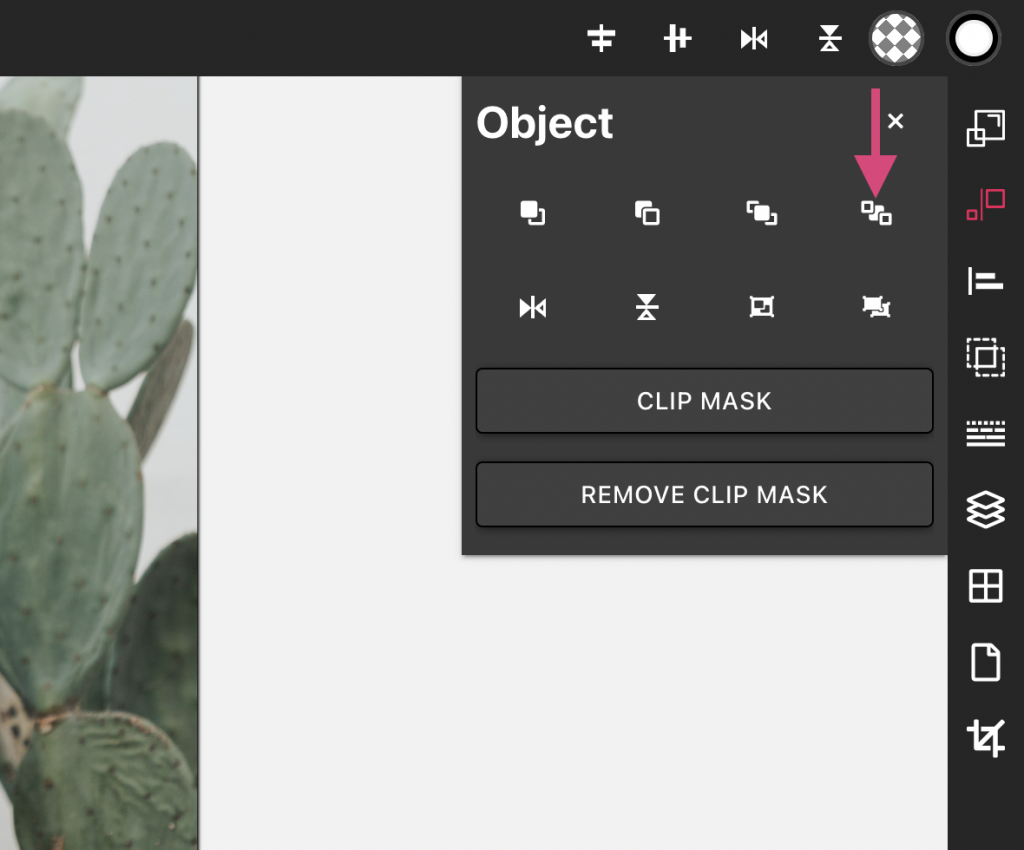
Open the Object panel via the toolbar on the right, and click the Send To Back icon to send the shape behind the image.
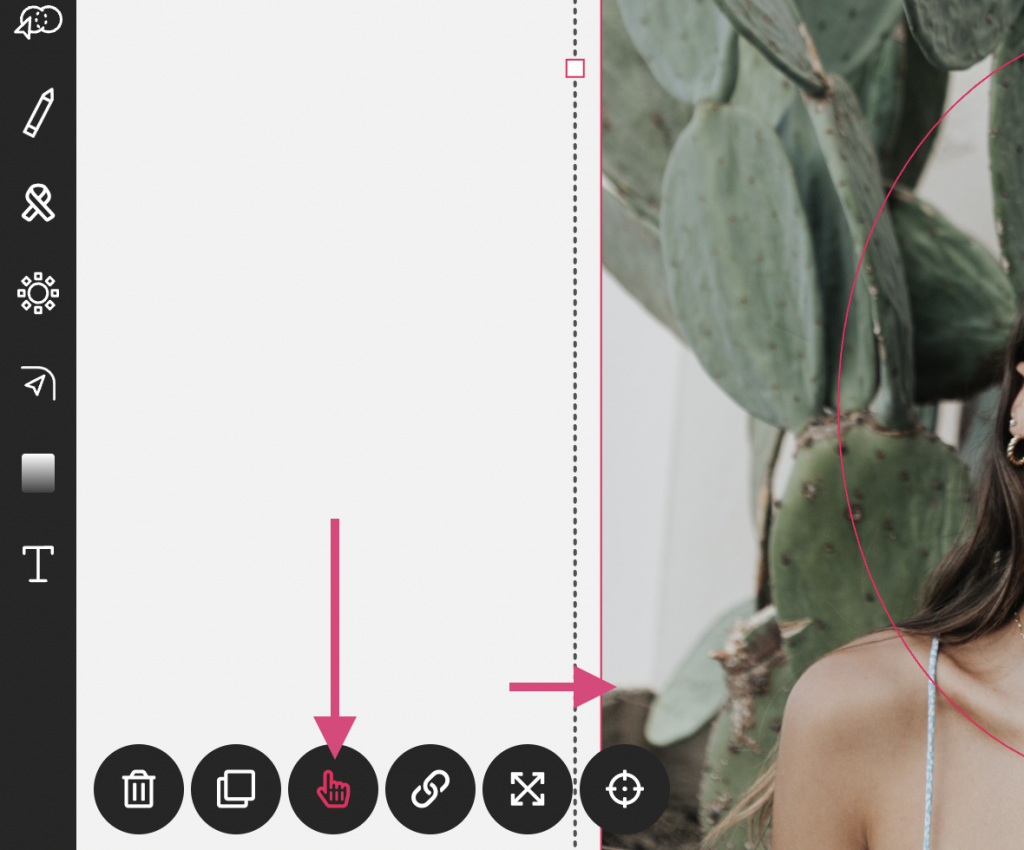
With the circle behind the image, click on the hand icon in the bottom left to activate multiple selection, then click on the image.
Step 4
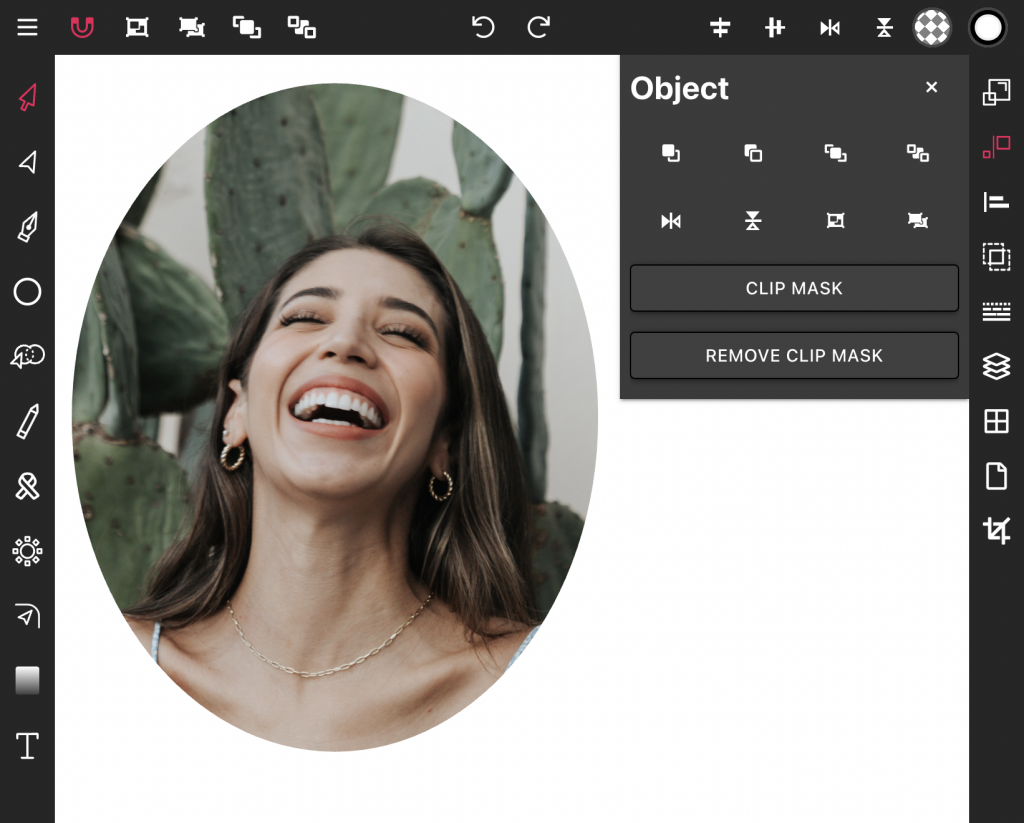
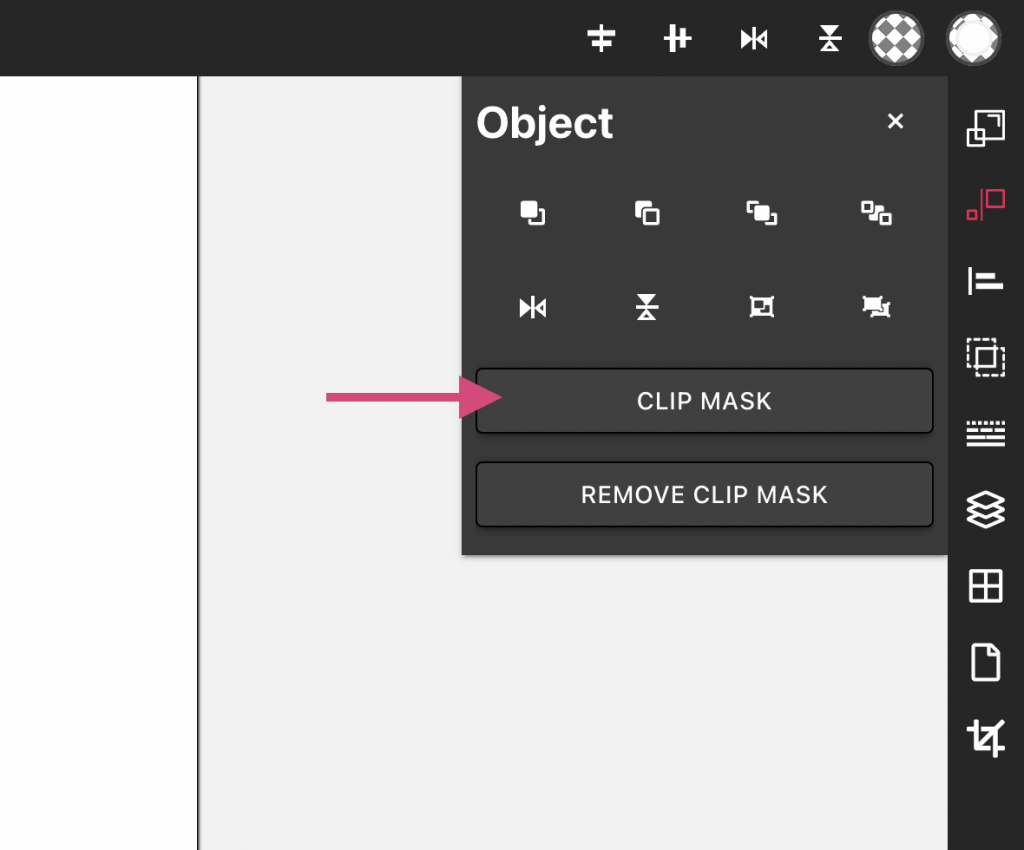
With both the image and the circle selected, open the Object panel on the right, click “Clip Mask”, and your image will be masked within the shape.

Conclusion
You can take this a step further and design a custom photo collage using squares, circles, stars etc. You can even draw your own shape with the Pen Tool and mask an image with that. The possibilities are endless with Vector Ink.
Comments: 2
Parabéns pelo excelente aplicativo!
Thank you!