How to Combine Two Letters into One Logo | Intertwined Monogram Design in Vector Ink
In this tutorial, you'll learn how to transform two simple letters into a p...
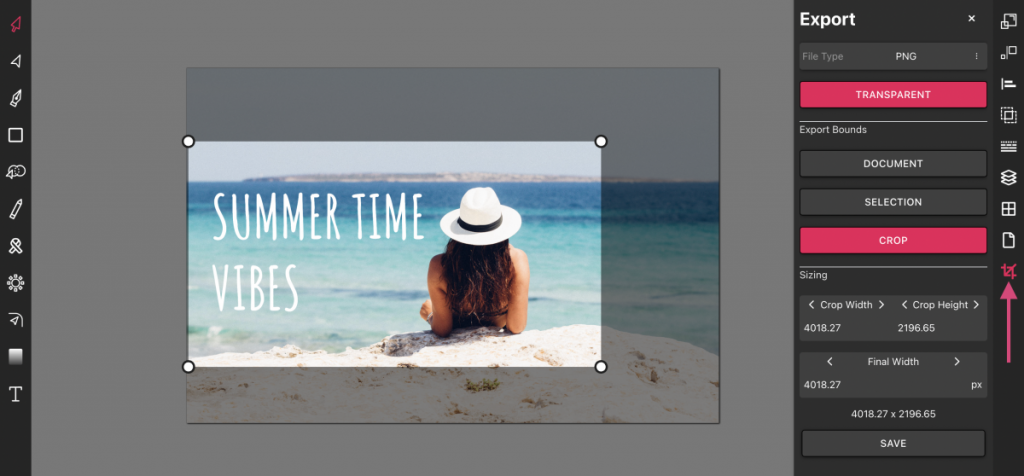
Easily convert an image to vector format and export the SVG for free using Vector Ink's online SVG editor. This streamlined process allows you to work seamlessly across any device, including mobile where interface adjustments enhance usability.

Begin by opening the Vector Ink web app. Click "Open" to launch the file explorer and select the desired photo from your device.
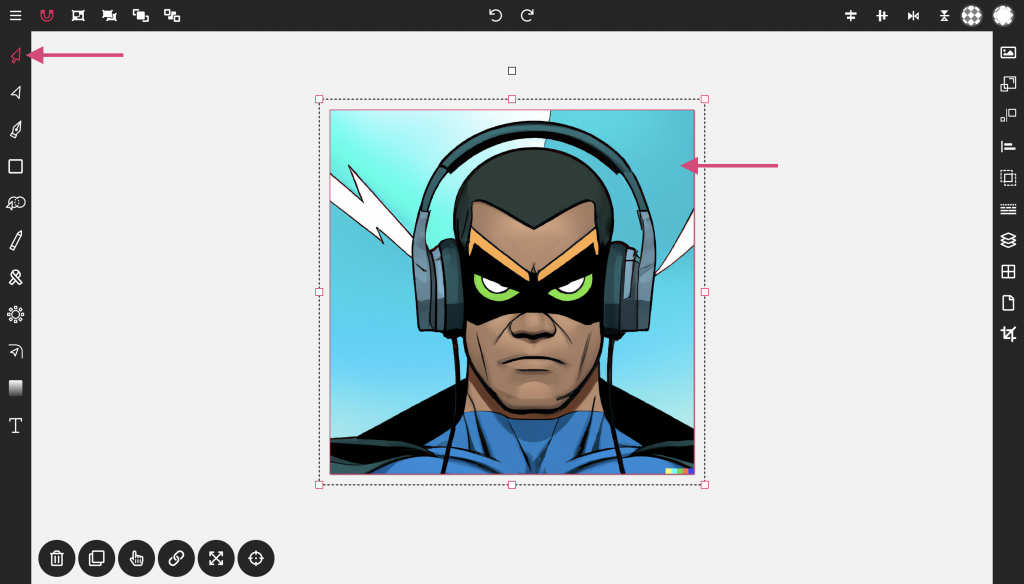
Once your photo is imported, you'll enter the canvas interface. Here, click on the photo to select it, preparing it for conversion.
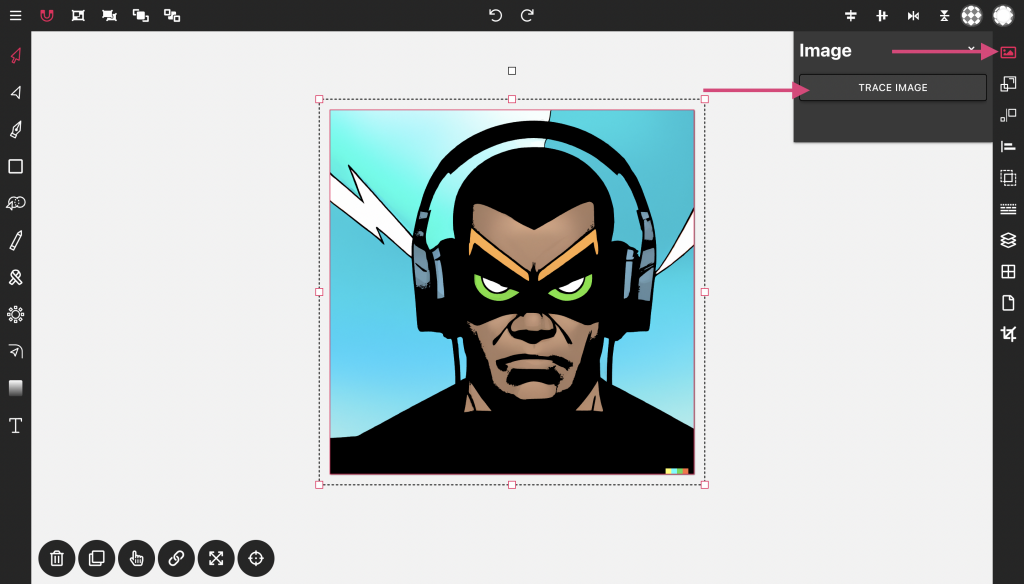
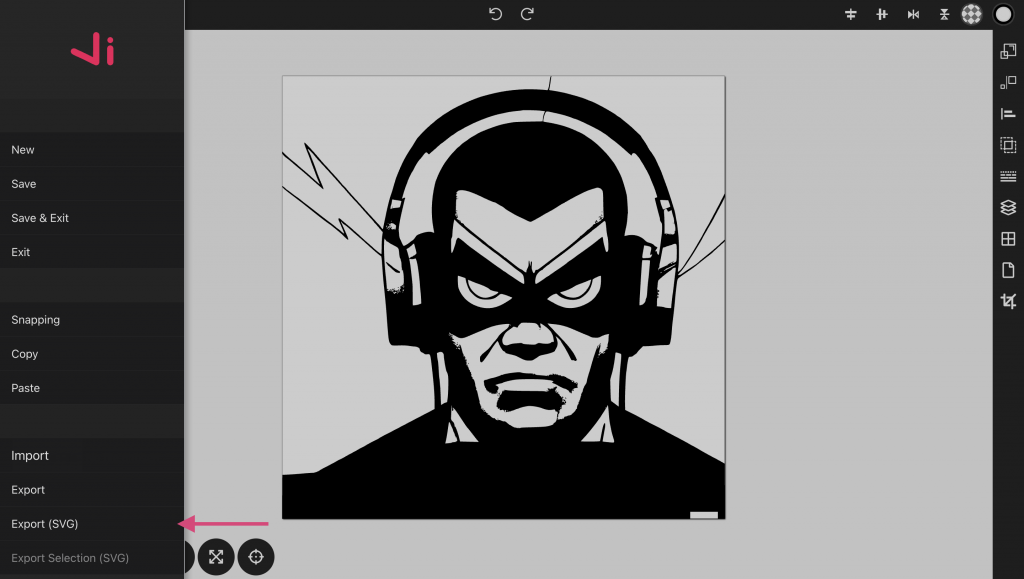
With the image selected, an image icon will appear at the top of the toolbar on the right. Click this icon, then choose "Trace Image." The vector trace will appear overlaying the original image. The next steps will involve hiding the original image and exporting the vector file.
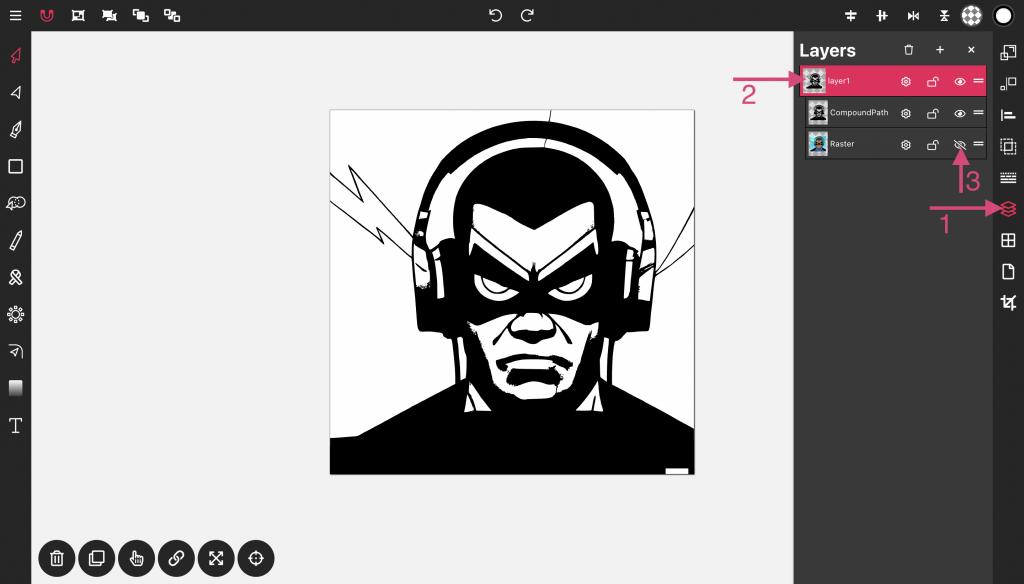
To hide the image, open the layer panel. Double-click on the preview image in layer 1 to reveal the objects under that layer. Click the eye icon next to the image (Raster) to toggle its visibility.
To export your file, click the menu button at the top left of the screen to access the main menu. Scroll down until you find the import/export option. Click "Export" to export the entire document as an SVG, or "Export Selection" if you only wish to export the selected portion.
Vector Ink provides a straightforward and free solution for converting images to vector format and exporting them as SVG files online. Whether you're using a phone, tablet, or desktop, the functionality remains consistent and user-friendly, enabling you to utilize any device you prefer.
In this tutorial, you'll learn how to transform two simple letters into a p...
Discover how easy it is to open the Vector Ink Icon Library, import icons t...
Most icon libraries offer a handful of basic shapes and call it a day. Vect...
Vector Ink is more than just an online SVG editor; it's a versatile tool th...
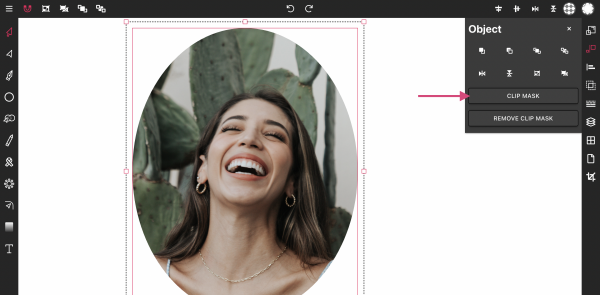
Masking images into any shape is easy and convenient with Vector Ink's onli...
Designing a logo can be an intimidating task with numerous elements to cons...