
SVG to PNG: How to Convert SVG Files to PNG (and When You Should)
Sooner or later every designer, crafter, and marketer hits the same wall: y...
Typography can make or break a design — and Vector Ink gives you total freedom to create and shape text exactly how you want. In this tutorial, you’ll learn how to add text, create text boxes, and even curve your text perfectly along custom paths.
This works just like standard text placement in other professional design apps — fast, direct, and intuitive.
Text boxes are perfect for paragraphs, descriptions, or labels that need clean alignment.
For full vector control, you can convert text into editable paths. This allows you to reshape or combine text with other vector objects using Boolean operations.
The Text on Path feature lets you wrap text around any shape, circle, or curve — perfect for logos, badges, or dynamic designs.
Adjust alignment (left, center, right) and spacing from the Text panel for perfect balance.
Typography meets creativity inside Vector Ink. Try adding curved, wrapped, or stylized text to your next logo or design — and see how quickly your work takes on a professional edge.
Sooner or later every designer, crafter, and marketer hits the same wall: y...
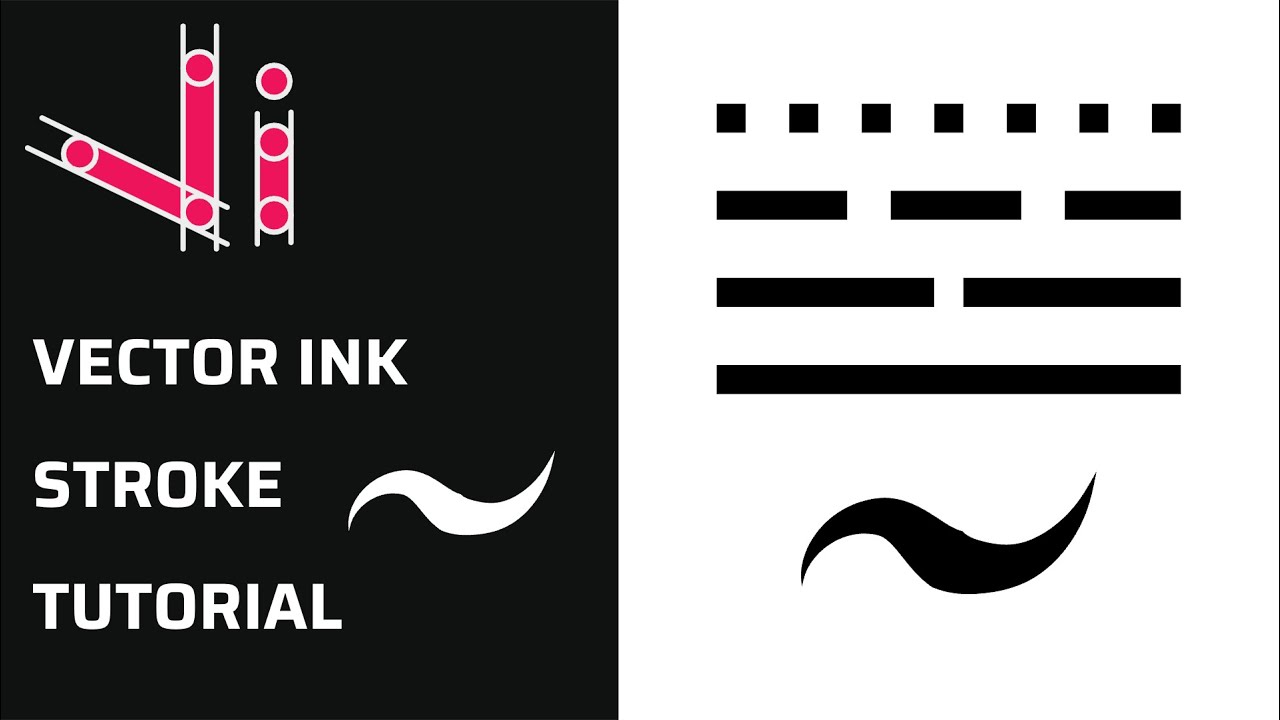
Take complete control of your outlines with the Stroke Properties Panel in ...
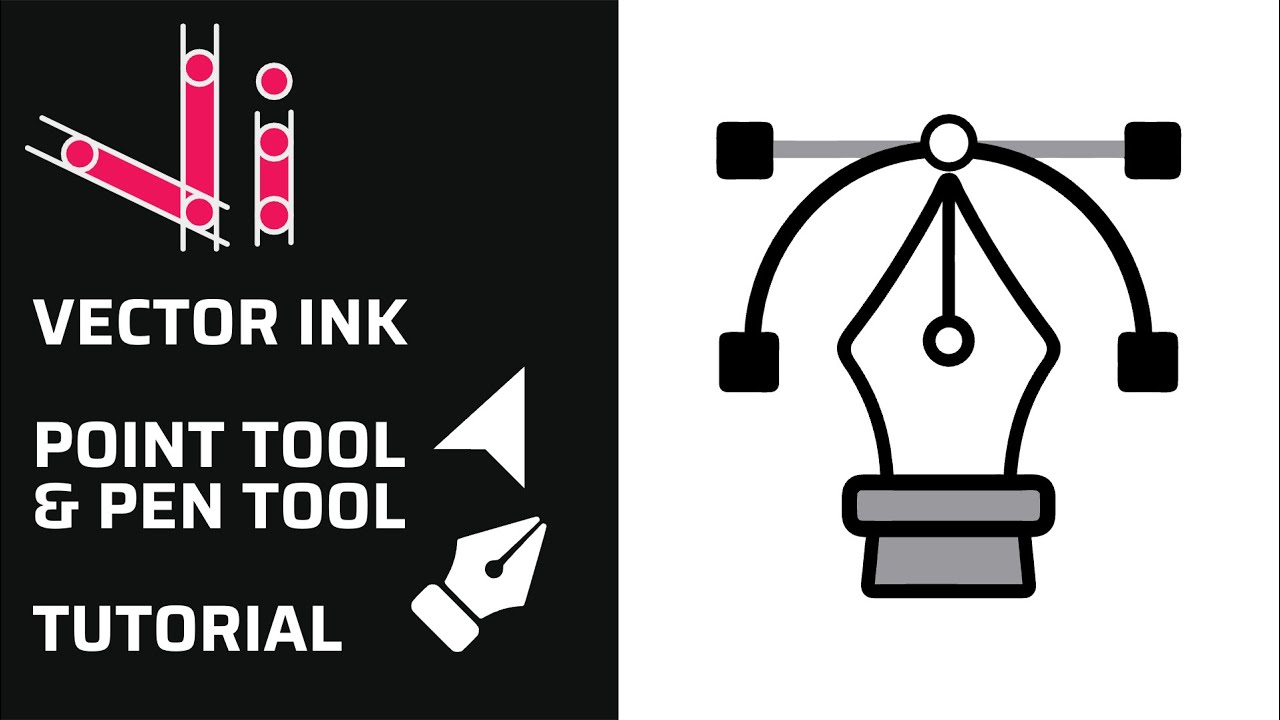
Clean vector paths are the backbone of logos, icons, and illustrations. In ...

Color is one of the most powerful tools in visual design — it defines emo...
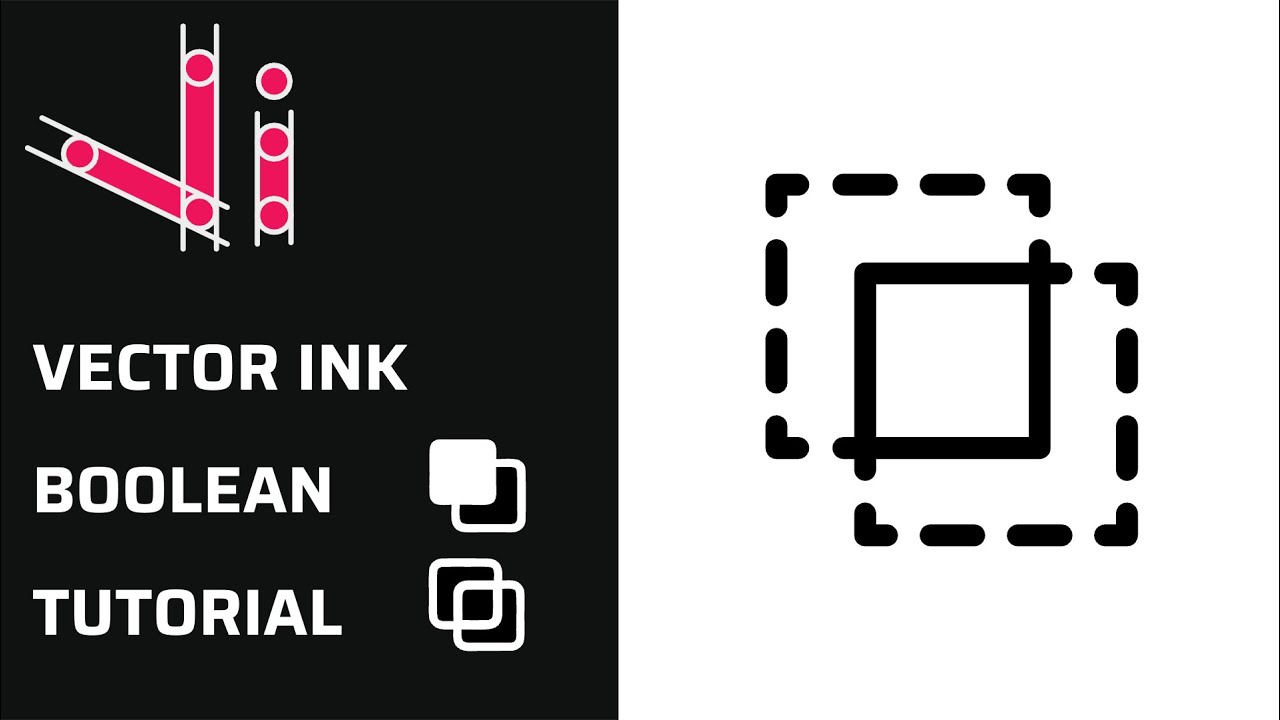
Boolean actions are the fastest way to build complex shapes from simple one...
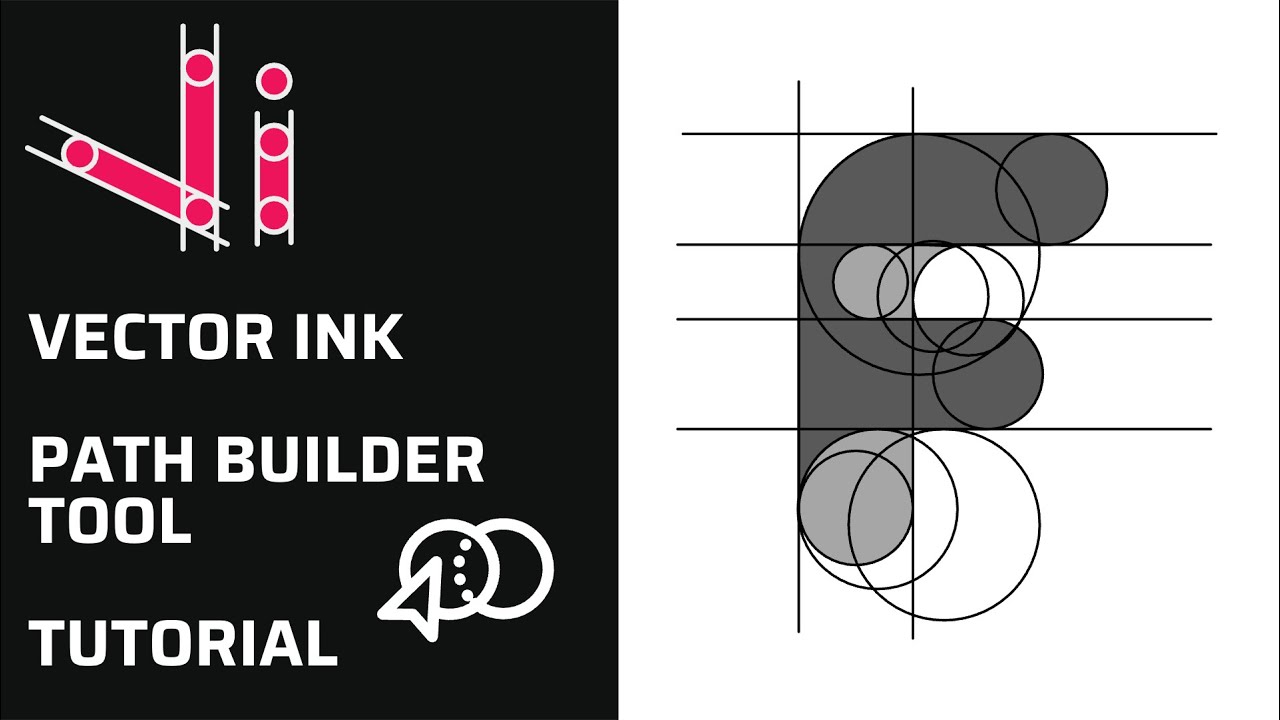
Vector Ink’s Path Builder Tool lets you combine, cut, and create complete...